
| You Are a Banana |
 People find it really easy to get along with you. You suit most tastes. And while you're very sweet, you're not boring or ordinary. You have an attraction to the exotic, and you could show up anywhere... doing almost anything! You are spirited, energetic, and a total kick to be around. You're also quite funny. Your sense of humor is on the goofy side, and it fits you well. |
Tuesday, June 24, 2008
I'm a banana, what are you?
Monday, June 23, 2008

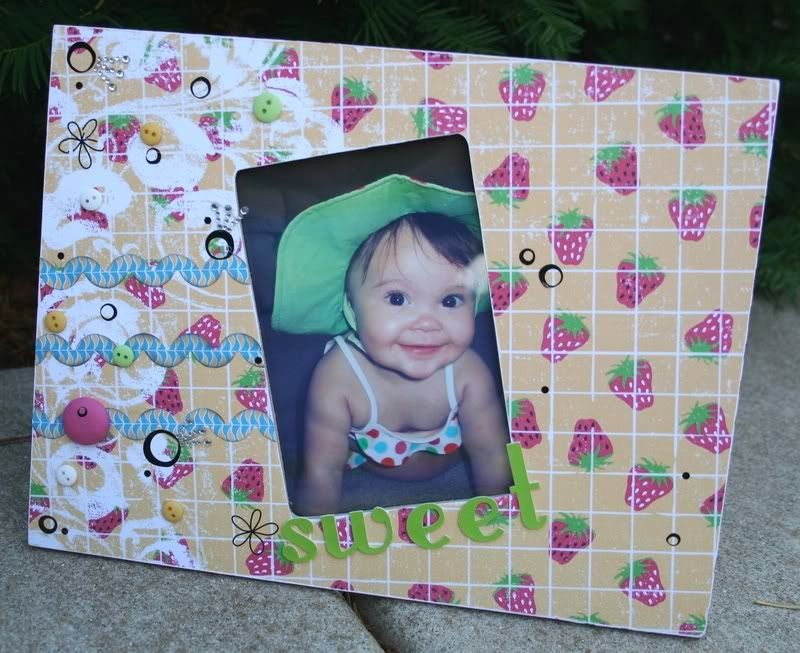
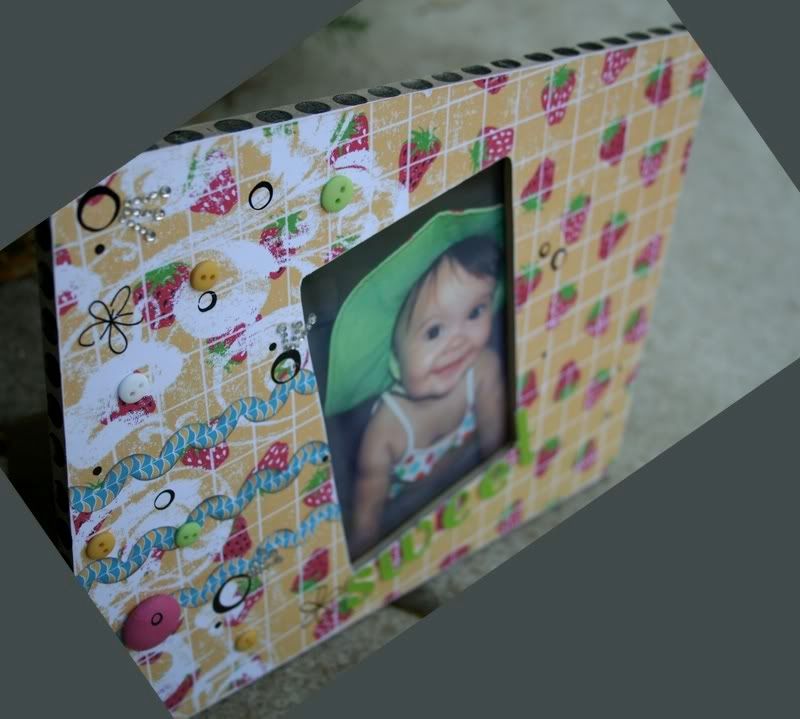
Glitz photo frame
I am still playing w/ the June 2 Gals kit, it has some wonderful Glitz goodies. My fav product so far... is their frosting and rub-ons which I cut out to serve my frame and LOs.
Thursday, June 12, 2008
What's RED, BLUE, WHITE, CREAM and Yellow?

It is Boxing for Liberty the June kit from The Scrapping Edge. It has the best of both worlds... Scenic Route New Liberty line and Basic Grey Boxer lines, mixed up in a grand way. Of course there is also the Scenic Route cool chipboard alphabet and buttons... brads... stickers... ohhh did I mention it has some clear Stars from Heidi Swapp and the coolest gel flowers too.... I can't believe you are still reading this instead of getting your kit at The Scrapping Edge.
Here are some pictures of the sneek peak (but remember is ready for ordering and the listof contents is here) and some of my creations w/ it.


Monday, June 9, 2008
2 Gals Scrappin' June kit is up!!!!
... and it is sooo cool and vibrant! and perfect for the Glitz Contest going on now. CLICK HERE FOR MORE INFO.
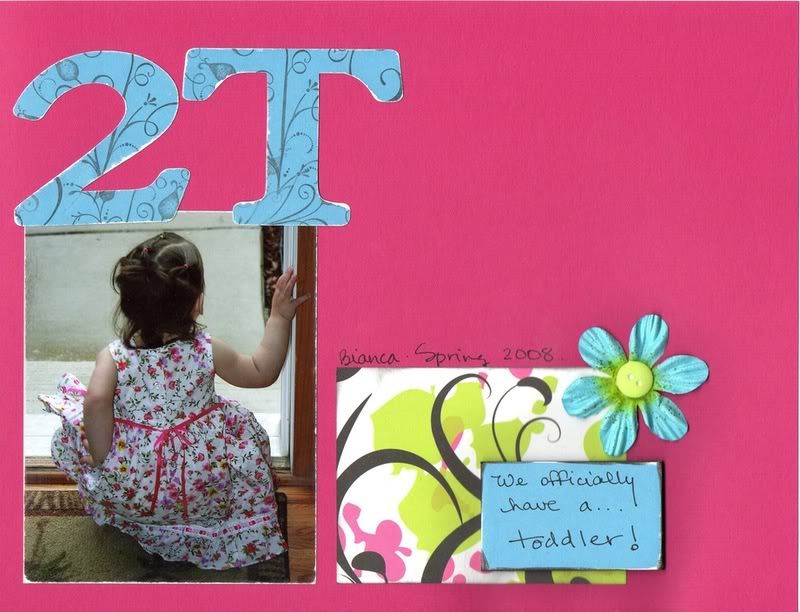

My first sample w/ the kit, is very simple but I thought that it needed to be. I have been dealing w/ my pretty baby wearing 2T clothes...
To get your kit... go HERE.
Sunday, June 8, 2008
Xmas in June....
I think the heat might be making me hallucinate. It is June and the heat index is 94!!!! So to try to cool myself down I am thinking cold thoughts... LOL!!!
The challenge this time is to create a xmas or winter LO that contains 1: paint; 2: bling; 3: photo(s)
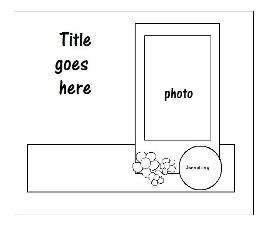
Easy enough... well not quite... I want you to use this awesome sketch that Nicole from MemorableSeasons.com made.
Here is my example:
1: paint: I used Adirondak denim wash and Tattered angel glimmer mist in a light blue color.
2: bling: silver tinsel trim RAKED by Kat (thanks girl); glimmer mist; brads from Hobby Lobby xmas collection.
3: photo: my DD's first xmas picture.

The challenge this time is to create a xmas or winter LO that contains 1: paint; 2: bling; 3: photo(s)
Easy enough... well not quite... I want you to use this awesome sketch that Nicole from MemorableSeasons.com made.
Here is my example:
1: paint: I used Adirondak denim wash and Tattered angel glimmer mist in a light blue color.
2: bling: silver tinsel trim RAKED by Kat (thanks girl); glimmer mist; brads from Hobby Lobby xmas collection.
3: photo: my DD's first xmas picture.
Friday, June 6, 2008
Tired of not having the perfect size envelope for your cards????
I AM!
Instructions for envelopes (NO MEASURING NEEDED!)

Step #1: Look for a piece of paper (thin paper is best) or wrapping paper or even pattern paper where your card will fit and have space all around it. You are going to place your card (here the green rectangle) smack in the middle of the paper you chose for the envy. Clear as mud so far?
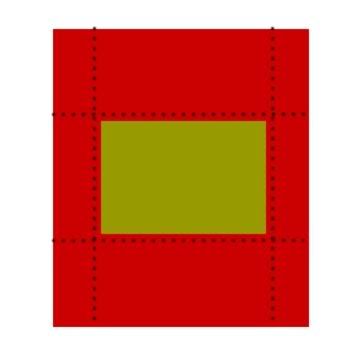
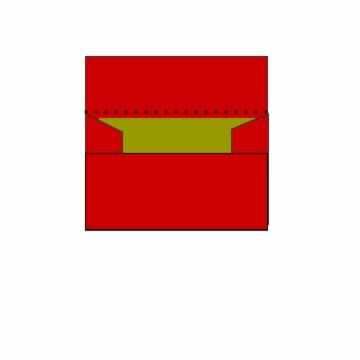
Step#2: Scoring around the card. This is were a thin paper is going to make a difference. You could go ahead and get your ruler and your bone folder and score around the card leaving a tiny space all around the card. All you could do like me... LOL!!!! I just go ahead and move my card a bit (for those that NEED measurements about 1/8 inch) up and fold the paper against the card... and keep doing that all around the card. In this picture the dotted lines are the score lines.
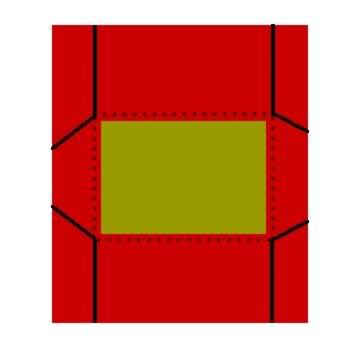
Step#3: Using a pencil draw the cutting lines like shown on Step #3 image.
Step#4: Cut following the cutting lines you did on the previous step.
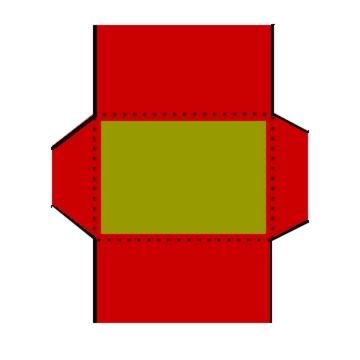
Step#5: Fold the two flaps on the sides following your score lines. Apply glue (or tape) to the two flaps on the side. NOTE: Notice that I didn't apply glue all the way to the top of the flaps since when I fold the bottom part there is a part of the flaps that is not going to be touching the bottom flap. Fold the bottom flap following the score line you did.
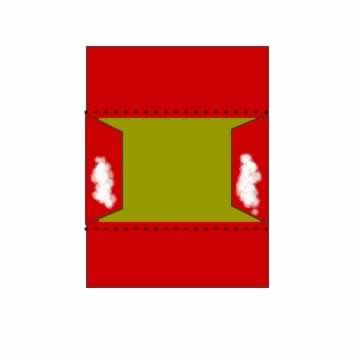
Step#6: Fold the bottom flap following the score line you did. And VOILA' your envelope is finished... put your card inside and glue the top flap.
I get so aggravated that after I make this beautiful card (for my standards) that I don't have an envelope the right size for it. So since right now I can't afford the Enveloper (is that what's called?; it's a tool to create envelopes) I have decided to make my own... the old way....
plus.......
NO MEASURING NEEDED!
NO MEASURING NEEDED!
so... are you excited for me or what???? of course I am sharing the instructions with you.... I even made some images to go w/ the instructions... I really need to figure out a way to make videos, but that is another day.

Step #1: Look for a piece of paper (thin paper is best) or wrapping paper or even pattern paper where your card will fit and have space all around it. You are going to place your card (here the green rectangle) smack in the middle of the paper you chose for the envy. Clear as mud so far?

Step#2: Scoring around the card. This is were a thin paper is going to make a difference. You could go ahead and get your ruler and your bone folder and score around the card leaving a tiny space all around the card. All you could do like me... LOL!!!! I just go ahead and move my card a bit (for those that NEED measurements about 1/8 inch) up and fold the paper against the card... and keep doing that all around the card. In this picture the dotted lines are the score lines.

Step#3: Using a pencil draw the cutting lines like shown on Step #3 image.

Step#4: Cut following the cutting lines you did on the previous step.

Step#5: Fold the two flaps on the sides following your score lines. Apply glue (or tape) to the two flaps on the side. NOTE: Notice that I didn't apply glue all the way to the top of the flaps since when I fold the bottom part there is a part of the flaps that is not going to be touching the bottom flap. Fold the bottom flap following the score line you did.

Step#6: Fold the bottom flap following the score line you did. And VOILA' your envelope is finished... put your card inside and glue the top flap.
Wednesday, June 4, 2008
Scrapmode Layout!
This LO is a mix of a few challenges:

- SNS - BOM #15 by Shannon ~ Modern Conveniences
What modern convenience(s) could you not bare to live without?
Computer? Microwave? Ipod? TV? Cell phone? - Tamara's Sketches #47
- ScrapMode's June LOs
Subscribe to:
Posts (Atom)